How To Clear The Codes Of A Check Engine Light
A practical step-by-step guide to how to clear the codes of a check engine light, including preparation, instructions, common issues, tips, and next steps.
How To Clear The Codes Of A Check Engine Light
This guide explains how to clear the check engine light on your vehicle by reading the diagnostic trouble codes, addressing the root cause, and using an OBD-II scanner to reset the light. It covers preparation, step-by-step procedures, and important warnings to avoid costly mistakes. Clearing codes without fixing the underlying issue often leads to the light returning, and in some regions, clearing codes may affect emissions testing readiness. The guide emphasizes safety, proper tool usage, and when to seek professional help. You will learn how to connect a scanner, record codes, interpret them, perform necessary repairs, and reset the system. It also includes troubleshooting common issues, advanced tips, and a final checklist to ensure you complete the process effectively.
Fast Answer
- Connect an OBD-II scanner to the port under the dashboard, read the diagnostic trouble codes, and write them down before clearing.
- Fix the underlying issue that caused the code, then use the scanner to erase the codes and turn off the check engine light.
Before You Start
- Locate your vehicle's OBD-II diagnostic port, usually under the dashboard on the driver's side near the steering column or fuse box.
- Acquire an OBD-II scanner; you can borrow one from an auto parts store or purchase a basic model that works with your vehicle.
- Review your vehicle's repair manual or online resources to understand common meanings of diagnostic trouble codes for your specific make and model.
- Ensure your vehicle is parked in a safe, well-ventilated area with the engine off and the parking brake engaged before you begin.
Step-by-Step Instructions
Prepare Your Vehicle and Locate the OBD-II Port
Begin by parking your vehicle on a level surface and turning off the engine. Engage the parking brake to ensure the car does not roll while you work. Open the driver's side door and look under the dashboard for the OBD-II port, which is a trapezoidal, 16-pin connector. It is commonly located near the steering column, under the glove box, or behind a small panel. In some vehicles, the port may be labeled with the letters 'OBD' or have a cover that needs to be removed. If you cannot find it, consult your owner's manual for its exact location. Once you have located the port, ensure you have easy access to it and there is enough room to plug in the scanner. Check that the area is clean and free of debris that could interfere with the connection.
Connect the OBD-II Scanner and Turn On the Ignition
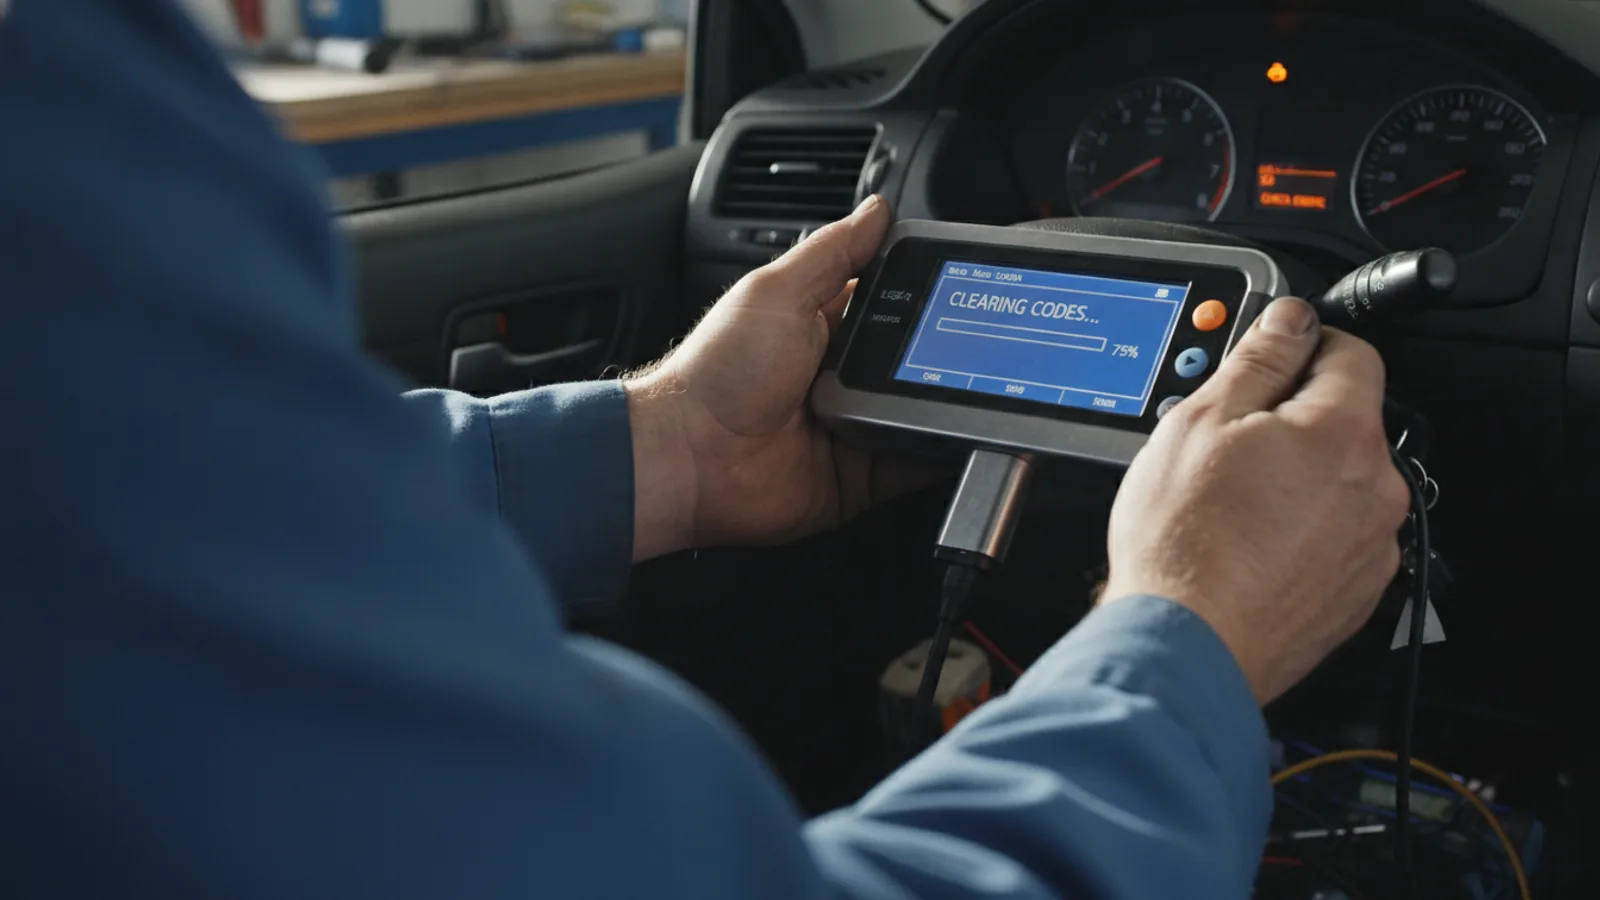
Plug the OBD-II scanner into the port until it clicks firmly into place. Some scanners require you to turn the vehicle's ignition to the 'ON' position without starting the engine; this powers the scanner. Refer to your scanner's instructions, as some may require the engine to be running. Turn the key to the 'ON' position but do not crank the engine. You should see the scanner's display light up and maybe hear a beep, indicating it is powered. Wait for the scanner to initialize and establish communication with your vehicle's computer. If the scanner does not power on, check the fuse for the OBD port or try a different scanner if available. Once connected, you can proceed to read the diagnostic trouble codes stored in the engine control module.
Read and Record the Diagnostic Trouble Codes
Navigate the scanner's menu to select the 'Read Codes' option. The scanner will display a series of alphanumeric codes, such as P0301 or P0420. Write down each code that appears, along with any freeze frame data if available. Freeze frame data captures the engine conditions at the moment the code was set, which can be helpful for diagnosis. Make a note of whether the code is pending, stored, or permanent. Pending codes may occur intermittently, while stored codes are present. Do not clear any codes yet. If multiple codes are present, record them all. This information is essential for identifying the root cause of the check engine light. If you have a code reader that only shows codes and not descriptions, you will need to look up the meaning of each code in a service manual or online database.
Interpret the Codes and Diagnose the Underlying Issue
Using the codes you recorded, determine what each one means. You can look up the codes in your vehicle's repair manual, on reputable automotive websites, or by using a code database in your scanner. Pay attention to the code type: P codes refer to powertrain (engine and transmission), B codes to body, C codes to chassis, and U codes to network communication. The first digit of a P code indicates whether it is generic (0) or manufacturer-specific (1). For example, P0301 indicates a misfire in cylinder 1. Once you know the meaning, diagnose the cause. For a misfire, you might check spark plugs, ignition coils, or fuel injectors. For an oxygen sensor code, you may need to test the sensor and its wiring. If you are unsure, consult a professional mechanic. Do not skip this step, as clearing codes without fixing the issue is only a temporary solution.
Perform the Necessary Repairs or Adjustments
Once you have identified the likely cause, address the issue. This may involve tightening a loose gas cap, replacing a faulty oxygen sensor, fixing a vacuum leak, or repairing a damaged spark plug wire. For complex repairs, such as replacing a catalytic converter, consider whether you have the skills and tools. If you are not confident, take your vehicle to a trusted mechanic. After completing the repair, double-check your work to ensure all components are properly installed and connected. Clear any loose tools or parts from the engine bay. It is also a good idea to reset any related maintenance reminders if your vehicle has them. Do not proceed to clear the codes until you are certain the problem is fixed, as the light will simply return if the issue persists.
Clear the Codes and Verify the Check Engine Light
With the repairs complete, reconnect the scanner and turn the ignition to 'ON' without starting the engine. Navigate to the 'Clear Codes' or 'Erase Codes' option on the scanner. Confirm that you want to clear the codes. The scanner will communicate with the vehicle's computer to erase the stored codes and turn off the check engine light. After clearing, start the engine and let it run for a few minutes. Check that the check engine light is off. If it remains on, it may indicate that the problem is not fully resolved or there are additional codes. In some vehicles, the light may blink, indicating a severe issue; in that case, stop driving immediately and seek professional help. If the light is off, take your vehicle for a short test drive to ensure everything is working properly.
Quick Reference
| Situation | Action | Why it helps |
|---|---|---|
| Check engine light is on and you have an OBD-II scanner. | Connect the scanner, read the codes, note them, diagnose the issue, repair it, then clear the codes and verify the light stays off. | This ensures you fix the root problem rather than simply erasing the code, which would likely cause the light to return quickly. |
| You have cleared the codes but the check engine light comes back on immediately. | Reconnect the scanner, read the codes again, and look for the same code or a new one; do not ignore it and repeat the diagnostic process. | Immediate return of the light means the fault is still active or a new problem exists; ignoring it could lead to serious engine damage. |
| The check engine light is blinking instead of steady. | Stop driving the vehicle as soon as it is safe, because a blinking light indicates a severe misfire that can damage the catalytic converter. | A blinking light signals a condition that could cause significant and costly damage if the vehicle is driven further. |
Common Issues
- No communication between scanner and vehicle.: Check the OBD-II port's fuse and ensure the scanner is plugged in properly; also turn the ignition to 'ON' and try a different scanner if available.
- Clear codes turn off the light temporarily, but it comes back after a day.: The underlying issue is not fully resolved; re-read the codes and perform a thorough diagnostic of the affected system, or consult a professional mechanic.
- You accidentally cleared codes without noting them.: Reconnect the scanner and try to read codes again; if none are stored, the vehicle may need a complete driving cycle or a professional scan to retrieve pending codes.
Advanced Tips
- Invest in a bidirectional scanner to not only read and clear codes but also perform active tests, such as cycling a fuel injector or testing an actuator.
- Use the freeze frame data to understand engine conditions at the time the code was set, which can help pinpoint intermittent issues.
- Track your diagnostic trouble codes in a notebook along with the date and repair actions; this can reveal patterns and help future diagnostics.
Final Checklist
- I have recorded all diagnostic trouble codes and their meanings before clearing.
- I have identified and repaired the root cause of the check engine light.
- I have cleared the codes using an OBD-II scanner, not by disconnecting the battery.
- I have verified the check engine light is off and taken a test drive to ensure the issue is resolved.
FAQ
Is it safe to clear the check engine light without fixing the problem?
No, it is not safe in the long term. Clearing the light without a repair will likely cause it to return, and it may hide a serious issue that could lead to expensive damage or unsafe driving. It is always best to diagnose the problem first.
Can I clear the check engine light by disconnecting the battery?
Disconnecting the battery may turn off the light, but it is not recommended. It can reset other vehicle systems, and on many modern vehicles, it does not clear all diagnostic codes, and the light may return after a few drive cycles. Using an OBD-II scanner is the proper method.
What does it mean if the check engine light blinks?
A blinking check engine light usually indicates a severe misfire that is causing unburnt fuel to enter the exhaust system, which can damage the catalytic converter. You should reduce your speed and stop driving as soon as possible to prevent further damage.